


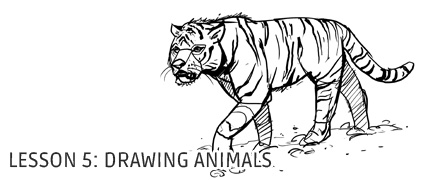


Lesson 5: Drawing Animals
As of October 8th 2016, after roughly two years of offering free critiques, I will now be limiting my own critiques to patreon supporters ($10 or more for this lesson specifically). But don't fret - you are still welcome to freely submit your work and questions directly to the /r/ArtFundamentals subreddit to be reviewed by the community.
Before we start, I assume you've completed Lesson 4 (and its prerequisites). Each lesson builds upon the last, so while you think you may know enough to jump in half way, or that the previous topics are of little interest to you, you'll be missing out on quite a bit. Start from the beginning, and you'll be glad you did.
Analytical and Constructive Drawing from Observation: Drawing Animals
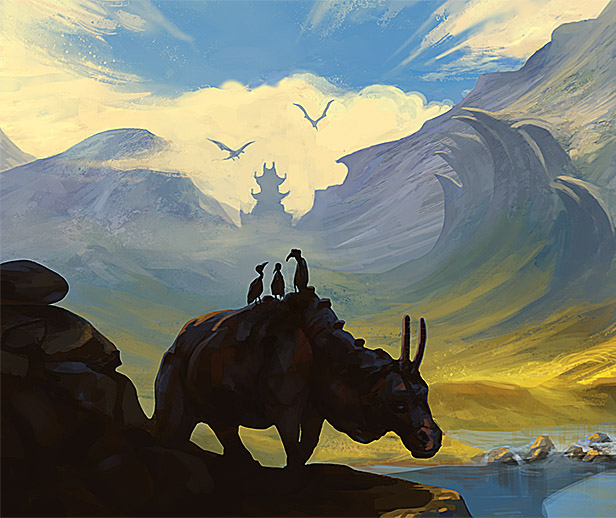
Based on my google analytics results, a lot of people seem particularly interested in the animal lessons! Well, here's the new version, with three brand new demos. Animals have a ridiculous amount of variety, and I'm going to try and cover some common configurations - the blue footed booby (bipedal, winged), the mexican wolf (quadruped, rather flexible) and the friesian horse (hooved, fairly lean and rigid). Note that I'm not including anything remotely close to a primate - my reason for this is that primates are very similar to humans, and I prefer to tackle humans with a somewhat different and more specific approach. Looking at primates this early on will muck things up a bit, so I ask that you also avoid them in your homework.

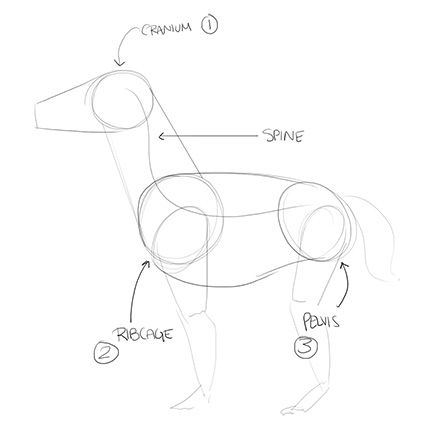 Figure 0.1
 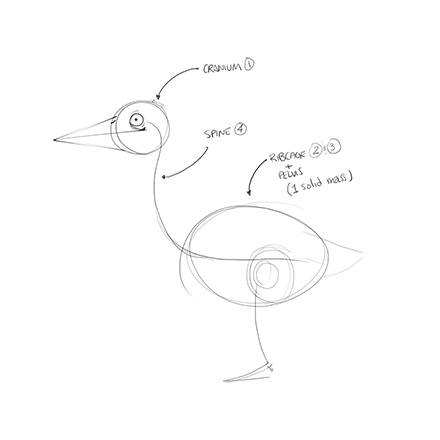 Figure 0.2
 Animals are primarily split up into three major masses:
- Cranium (Head)
- Ribcage
- Pelvis
For birds, you'll find that the ribcage and pelvis are pretty much fused into a single ball-type form.
These three forms - all of which are balls (not perfect spheres, but balls that can be squashed and stretched) - are connected by a flexible spine. These are the forms you'll want to define first, to capture the general pose and gesture of your animal. Pay attention to the angle of the ribcage and pelvis - these are most often going to be elliptical forms that sit at an angle.
Once these are positioned, you can start connecting them with other forms - for example, the bean form of the torso that stretches from the ribcage to the pelvis.
With your major forms blocked in, be sure to reinforce the threedimensionality and the volume with some general contour lines here and there to make sure that you yourself are perceiving them as 3D forms. At times, using straight lines as opposed to smooth curves can help establish a sort of chiselled sort of 3D appearance, and can help you perceive cleanly cut planes. These are often easier to wrap your head around than smooth curving surfaces, especially in situations with a lot of foreshortening and perspective.
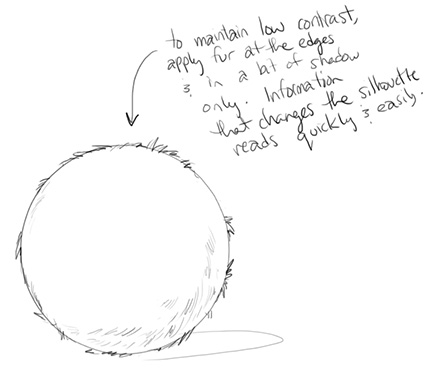 Figure 0.3
 The other matter I wanted to touch upon is the issue of fur. It's very easy to get carried away with drawing fur textures, and most often it's really not necessary. Attempting to render fur will often result in a lot of contrast, which will create a focal point whether you want it or not. There are tricks, however, to imply the presence of a furry surface texture.
Instead of covering an entire object with fur, it is generally more effective to simply alter the silhouette of the object. This means applying your furry protrusions around the edge of the object. If you imagine that all of your objects were filled in with black against a solid white background, all you would see is its solid silhouette - and the only information you'd have to infer its surface texture is the consistency and quality of the its edge. This is the type of information that viewers will read the quickest, and the kind of information that will stick the most.
It's also the reason that the sort of rough, chicken-scratch sketching that you see from beginners is to be avoided. As you gain more skill, you realize that the weaknesses from your early days can be harnessed as tools - as long as you can control them, and apply them only when needed.
 Figure 1.1
 Since the old set of demos started off with a bird, I figured this would be a good place to start. Due to their torso shapes, they're somewhat simpler to approach, since we can consider the ribcage and pelvis to be a single mass.
Here is video recording of this demo (no audio):
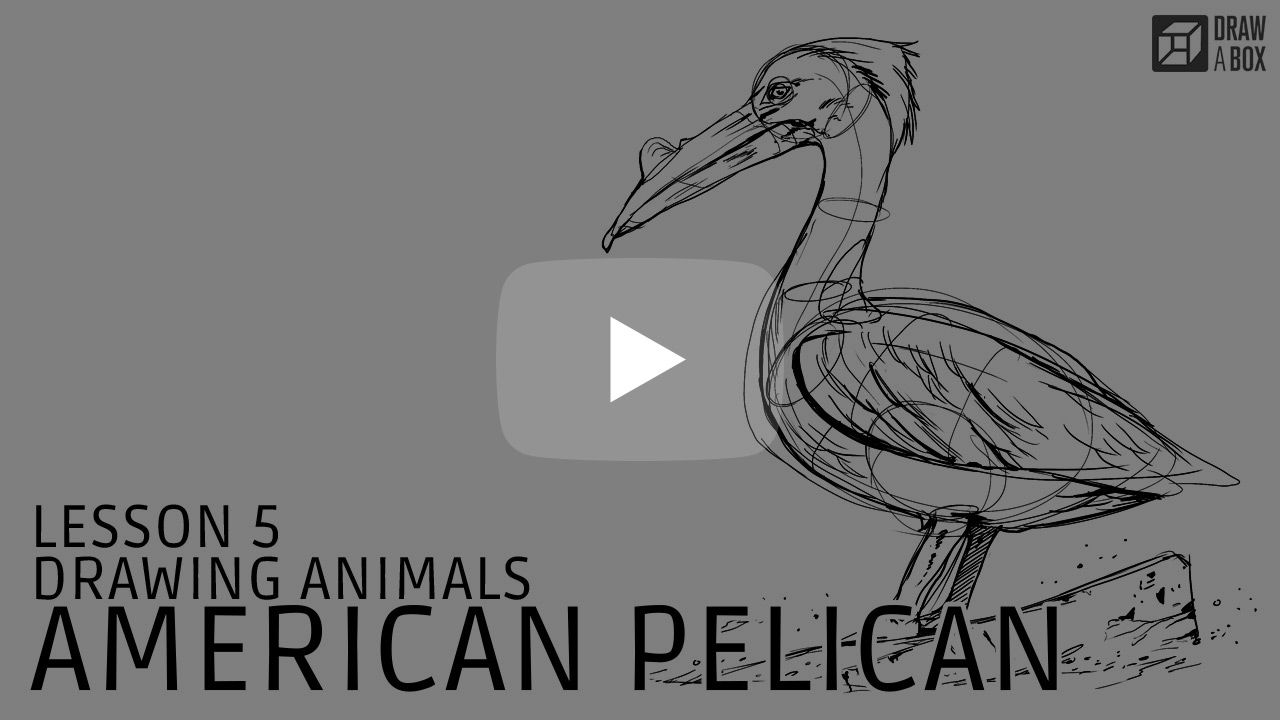
 Figure 1.2 Establish Your Major Forms
As I mentioned above, we've simplified the torso into a single mass, rather than splitting them into ribcage and pelvis. Keep in mind that the masses you see here are not flat, 2D shapes. They are 3D forms. Of course, the only difference is in how you choose to perceive them, as the outline of a 3D ball will still be drawn as an ellipse. If you're not entirely comfortable with this, you may choose to add one or two contour curves to help reinforce the illusion, but don't go overboard and make sure you're not sloppy in their execution.
 Figure 1.3 Beginning to Construct the Head
This is a small step, but I wanted to focus on how the base of the beak there wraps around the ball of the cranium where it connects to the head. Being mindful of this curvature is extremely important, and if you don't properly perceive the illusion of that cranial mass being a 3D ball, you will not draw this curve correctly. Always remind yourself that we are dealing in three dimensional forms. Additionally, you can see that I've added an eye socket, and I've roughly gauged how long my beak is going to be.
 Figure 1.4 Fleshing out the Beak and Neck
I've fleshed out the rest of the beak, adding a couple of little contour curves to help maintain the illusion of form. Additionally, I'm using a similar technique with the neck as I introduced in lesson 3, when dealing with stems and branches. That is, placing a couple of ellipses along the length in order to give myself some targets to hit when I construct the edges of the tube. I've also distinctly defined how that neck-tube is going to connect to the torso. Think of it as a headphone jack (very topical, what with the recent iPhone 7 announcements, I know). You're setting out the hole, so you know exactly where to plug the neck in.
 Figure 1.5 Refining and Developing the Forms
So I've played connect-the-dots with the neck ellipses and constructed that tube. I've also added the remaining major forms - that is, the thigh masses, the legs and the feet. Admittedly I put the legs way too close together, but these mistakes do happen, and when they do, just keep pushing forwards. You'll notice that the thighs are not visible at all in the drawing. That is, they're there, but you can't make them out and differentiate them from the rest of the torso, because of how the feathers all blend everything together. It is entirely necessary however for us to understand what is going on underneath the skin - having eaten many a bird in my long life, I am all too well aware of their jucy, succulent thigh-meats, so how could I refrain from including them? Draw on all of your experiences, and feed your curiosity. Study and observe everything around you, as this information will prove to be very valuable in pushing the believability of your drawings in the most unexpected of ways.
 Figure 1.6 More Forms! It's Forms All the Way Down
Looking closely at the reference image, you'll see that there's a few other forms that we were missing - the wing's a big one, but there's also the transition between the back of the neck and the torso, something easily missed. With the wing, I felt it especially important to separate that form from the rest of the torso, so I leveraged a couple of contour curves here to help puff it out.
 Figure 1.7 Details
Since you're this far through the lessons, you know how I feel about detail - it's not that important. It's really where you can let your observational skills shine the most, since you can worry a lot less about constructing everything, and behave more like a mindless photocopier. Just make sure you don't go overboard, as it's very easy to lose track of the underlying forms. Less is always more with this sort of thing.
 Figure 2.1
 I tend to draw a lot of bears for demos when doing critiques, so I figured I'd draw one here. You can find a handful more in the 'other demos' section of this page.
Here is video recording of this demo (no audio):
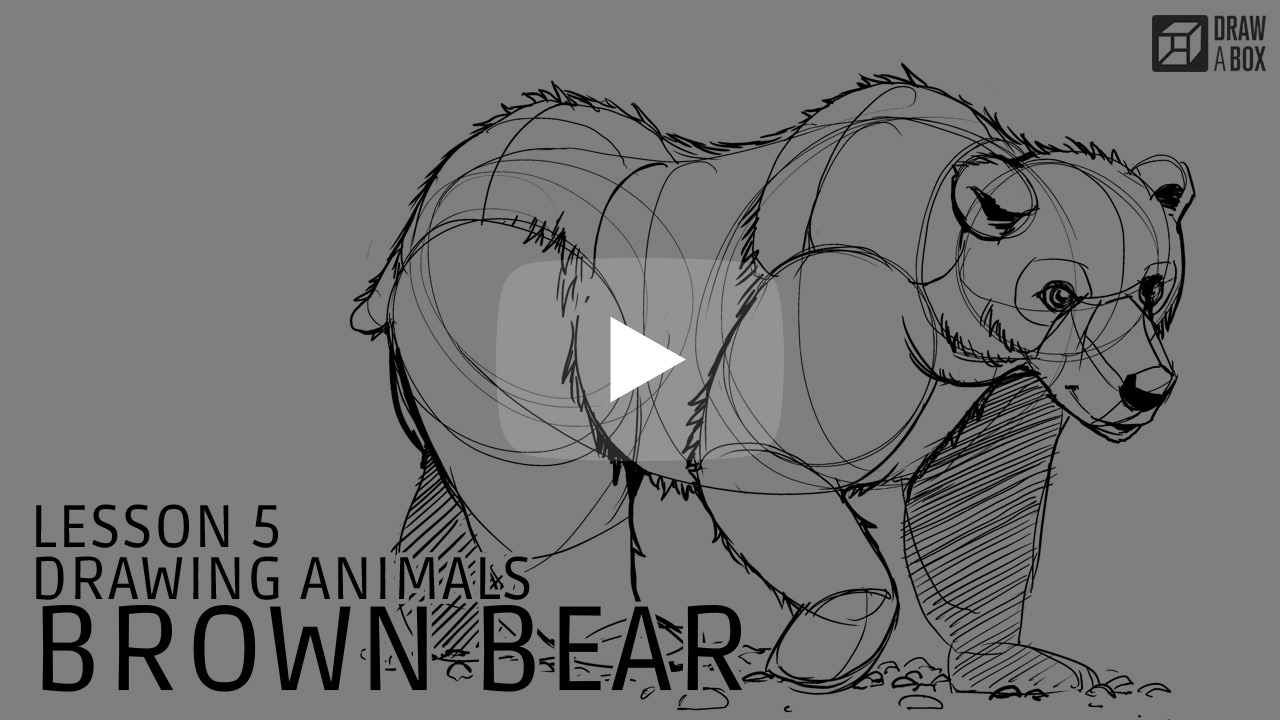
 Figure 2.2 Lay In Initial Masses
This is a more traditional, three-mass approach. Cranial mass, big ole ribcage, and a pelvis. As I mentioned in the intro video, keep an eye on the size and angle of your pelvis and ribcages. The cranium is generally a sphere, but the other two will be squashed and stretched and set at angles to match the masses they represent.
 Figure 2.3 Build the Torso Sausage
Sometimes I'll even do this before drawing the cranium - connecting the ribcage and pelvis into a single sausage mass. Make sure your width through the center of this sausage remains consistent - if the bottom dips down to match a sagging belly (which it often will), the top should dip to match it. I've also drawn two contour curves along my cranial mass to help reinforce the illusion of 3D form. This kind of cross-contour is really helpful in determining and constantly reminding yourself where the center line of the head rests, and giving you a good landmark to rely upon when building up more forms.
 Figure 2.4 Adding a Muzzle to the Head
The muzzle is basically just a box at this point, though with some animals it may be a little more complex (basically with a few more faces), but it's generally this sort of thing. Just carefully observe your reference and try to identify where the faces of your muzzle-form turn. Regardless of how many faces there may be in the form, those faces tend to be very planar, so you can see where one stops and another begins. Make sure you're aware of the cranium's curvature where the muzzle-box connects to the cranial mass. That connection is just about always going to have a nice curvature to it.
 Figure 2.5 More Facial Construction
Remember that everything is a matter of carving or connecting more forms - the ears, just like the muzzle, connect to the cranial mass and must therefore have connections that curve along the initial ball's surface. Additionally, be sure to carve out eye sockets so that when you do ultimately place eyes on the head, they're not simply floating arbitrarily in space.
 Figure 2.6 And more...
I'm genuinely getting tired of talking about this bear's face - and now it's got that dopey little smile. Stupid bear, what've you got to be so smiley about!
 Figure 2.7 Additional Muscle Masses, and Starting the Legs
Okay, back to the body. So you'll notice that I've drawn in a mass for each shoulder, largely to help define how and where the legs themselves attach to the torso. I've also built up some additional forms across the back, bridging the shoulders across the spine. This isn't something I do for all animals, it's just that this bear in particular had some really exaggerated forms. Always let your reference image guide your decision making. If your reference has some additional masses, build them up wherever is needed - just make sure you don't ever drop on any floating visual information. Everything must be grounded in form and construction.
 Figure 2.8 Add the Legs
With legs I'm almost always a lot more focused on the gesture and flow of the limbs, rather than constructing tangible, three-dimensional forms. As I explained in the intro video, this is because it's best to avoid tackling two challenges simultaneously. In this case, that would be the challenge of creating solid forms, and the challenge of maintaining flow and gesture and avoiding stiffness. Once you've established shapes that flow nicely, you can then build solid forms around that - and once you've practiced, you'll find that everything you draw will start to carry a degree of form with it, whether you focused on it or not. For example, the way the different sections of the legs connect at the joints maintains a sort of curvature that implies form already, without me explicitly allocating mental capacity towards it. That is really the goal of all of this construction business - to fundamentally change how you see the world, and how you draw on a subconscious level.
Make sure that you do define the joints, though. If you let the leg flow straight through from shoulder to foot with no clear bends or breaks, it's not likely to come out well. Make sure you're aware of every point at which the leg is able to bend, so that each segment of the leg is a separate shape/form. You can be a little more lax with the legs on the opposite side of the form (I often go to some lengths to purposely flatten them out - ignoring the joints in the left front leg is one way I approached that).
 Figure 2.9 Detail
Again, detail. Some minor tufts of fur along the silhouette, pushing those left legs back by purposely flattening them out with hatching lines, and so on. That's definitely something to be mindful of, actually - hatching lines *will* flatten things out. This can be a powerful tool, as I've used it here, but beginners have a tendency to rely far too heavily on it in order to fill spaces in with noise, inadvertently flattening important forms out entirely. Make sure that everything you do is intentional, and is driven by a decision you've made. Don't just do things for the sake of doing them.


These exercises should be done traditionally, using a felt tip pen (0.5mm is ideal). I use the Staedtler Pigment Liners, and sometimes the Faber Castell PITT artist pens (more expensive and higher quality), though there are plenty of other brands that work just as well.
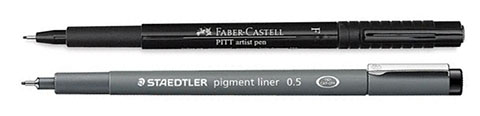 Figure 1.14 Felt Tip Pens
In previous exercises, I allowed ballpoint pens to be used. For these, I insist you use a felt tip pen, as it will force you to deal with your pressure control - an issue that will help across various other drawing media.
As homework, I recommend doing at least:
- 2 pages of birds (each page dedicated to a different species)
- 4 pages of two non-hooved quadrupeds (wolves, cats, bears, ferrets, etc.) - meaning, pick two subjects and do two full pages for each
- 4 pages of two hooved quadrupeds (horses, deer, antelope, camels - I'll also accept rhinos, elephants, etc. I know they're not hooved, but it's more about the configuration of their bodies that makes me group them together)
- 2 pages of any animals - you don't have to dedicate a page to any animals, just take this opportunity to try a wide variety of animals (lizards, fish... dinosaurs?)
- 1 page of hybrids - taking various pieces of reference (preferably ones you had a chance to study over the course of this lesson), try to combine them to make some interesting hybrids
Take your time, and take as many breaks as you need. No need to rush. I expect this to take you at least eight hours, likely more.
Either draw from life, or use high-resolution reference images. Google images (be sure to set the size to large under search tools) and pinterest tend to be good sources of reference. You may also want to check out Warren Photographic Image Library of Nature & Pets, which comes at /u/Serpes' recommendation.
If you want a critique and some direction, you can submit your homework for review as a comment on this lesson's post on /r/ArtFundamentals. If you do choose to submit, please be sure to complete the homework in its entirety in the required medium/media. While I am happy to help out, it does take a lot of time, and I'd greatly appreciate it if the time is taken to fully read and digest the material.
The demos below are outdated, but still have some relevant information so I've decided to leave them up. Keep in mind that when I wrote and recorded these, I was putting much less focus on the importance of dealing in solid forms and construction than I do now.
 Figure 1.1
 These dopey looking birds actually look really interesting, once you get past their hilarious name and blank expression. The way their neck has a bit of an S-curve turned out to be really fun to draw. Following rhythms like that tends to be very useful when attempting to capture them on paper.
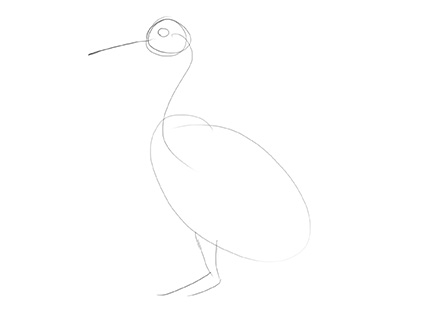 Figure 1.2 Find the head, torso and spine
Start off by blocking in your head and torso masses, and connecting them with the spine. Pay close attention to your reference as you do this. Note the rhythm and flow of the spine, and the proportions of your major masses.
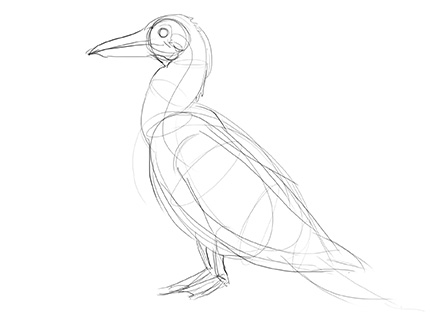 Figure 1.3 Flesh out your major forms
Start fleshing out your major forms. Follow the spine as a guide, and treat this as a form intersections, but with organic forms. Apply contour lines here and there where necessary to help yourself perceive the object as three-dimensional, but don't go overboard with them and end up drawing a 3D wireframe. A couple contours here and there is great, but make sure they're not regularly spaced, as this will end up creating a very boring pattern.
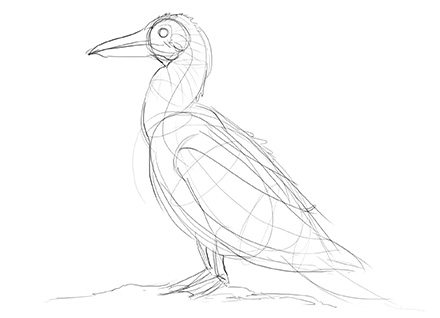 Figure 1.4 Fleshing out the wing structure
By observing my reference carefully, I noted that there were several distinct rows of feathers along the wing which seemed to separate a little bit. I took this opportunity to mark in a subtle separation for them - kind of like marking out rows of feathers.
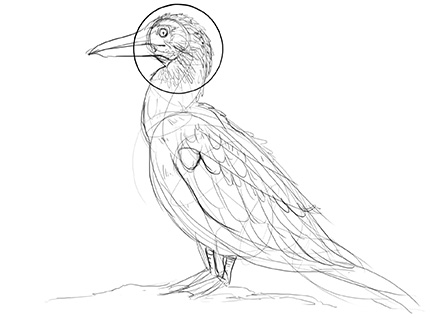 Figure 1.5 Detail
Once my block in was done, I went into detailing. I didn't push this one too far, but I focused most of my detail around the head. I did apply a little bit of light feather detail along the edges of the silhouette outside of this focal point, though. Using the same technique I explained in regards to fur above, I was able to keep from increasing my contrast and avoided competing with the focal area.
Once you're done this step, don't forget to do your analysis/study sketches of interesting features you found to be notable in the subject.
 Figure 2.1
 Now, a wolf. You can look at a wolf and a horse and say they're both quadrupeds, but I feel that wolves being significantly more flexible puts them in a different category entirely. This category would contain cats, dogs, bears, ferrets, mice, etc. Anything that primarily moves around on four legs and can go all flippity-floppity, if you know what I mean.
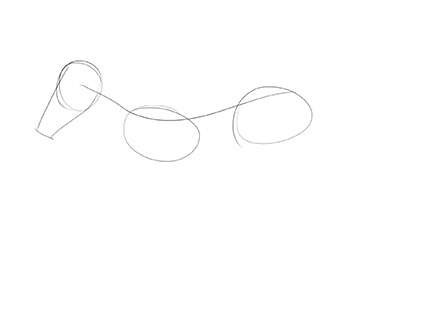 Figure 2.2 Lay in your major masses
Once again, laying in my main masses and connecting them with the spinal gesture line. Notice that when it comes to the head, I did block in the protruding muzzle from the main cranial mass, but I did not incorporate the open jaw. At this point it wouldn't do me any good to drop it in, since its position is completely dependant upon the rest of the head. It could be removed completely and wouldn't make any difference.
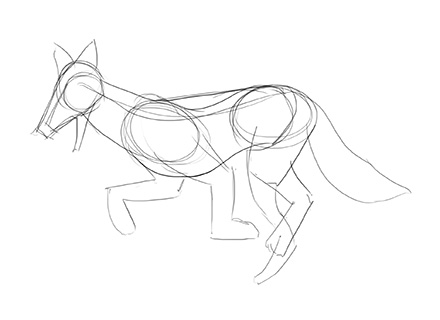 Figure 2.3 Flesh out your major forms
Building up the rest of the forms around my major masses and spine. Similar to the jaw's relationship to the head, the limbs are completly governed by the position and orientation of the torso - not the other way around. So don't block them in until you've got the torso down.
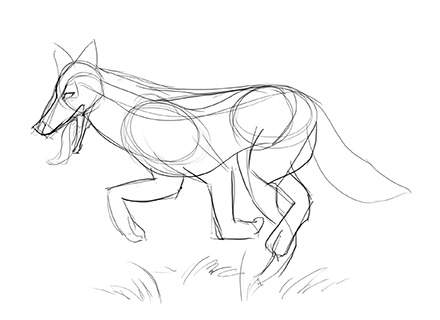 Figure 2.4 More of that
Just continuing with fleshing out my forms. Dropping in some basic facial structure and landmarks. Placing your eyes correctly is fairly important, and everything else tends to fall into place around their position. Keep looking closely at your reference!
Also, don't forget to ground your animal. Looking at it now, I definitely didn't do that too well at this stage (I fix it a little later on), but at least there's something there. Knowing roughly where the ground lies will help you judge your proportions.
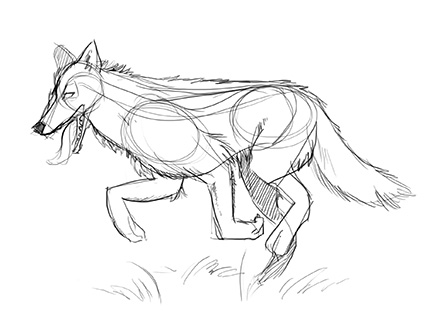 Figure 2.5 Adjust your silhouette to imply texture
Just as before, you can start breaking up that silhouette's clean edges to give the impression of tufts of ragged fur.
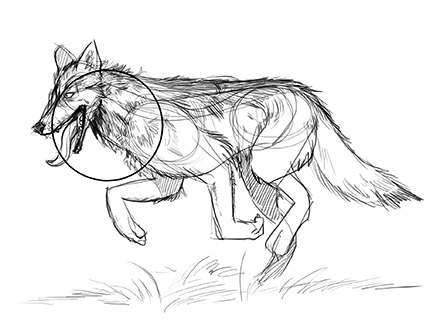 Figure 2.6 Detail
Now that you're more or less done, you can push the detail in your focal point. As always, don't go overboard, but add enough to make it stand out a little bit over the rest of the drawing.
 Figure 3.1
 Also known as the 'belgian black', this breed of horses is one of my favourites. They're used pretty often in film too, like in the film Alexander as the famous horse Bucephalus. They just look awesome - that's all you need to know.
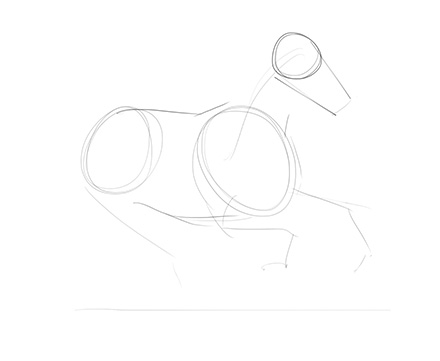 Figure 3.2 Lay in your major masses
No different from the other two. Drop in your major forms - head, ribcage, pelvis - and find the spinal gesture. With hooved animals, however, I have particular trouble with the proportions of their limbs, so for anything I find difficult, I try to block it in a little bit loosely earlier on. In this case, I dropped in the limbs as simple lines to see how those proportions work against the rest of the body.
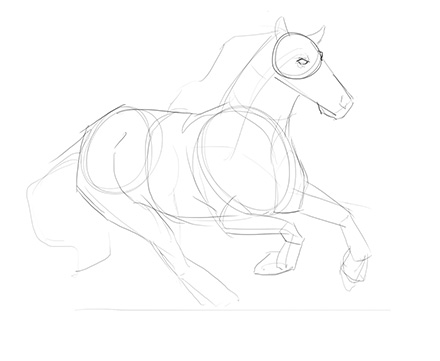 Figure 3.3 Flesh out your forms
Using the scaffolding from the previous step, build up the rest of your forms. With horses especially, I find straight, angular, chiseled lines to be the most effective. As I mentioned before, sometimes curved lines don't cut it, because they're too approximate and uncertain. If you're putting down a single, straight angle, that's a commitment, not unlike making a clean cut into a slab of marble, creating a nice, planar form.
 Figure 3.4 Bringing lines forward
Sometimes, if you find your drawing getting a little messy, it can help to accentuate certain lines to bring them forward - and in turn, push the rest of the mess back. Be very careful doing this though, as it can easily get out of hand. Don't apply weight carelessly, because once it's on the page, it won't be coming off.
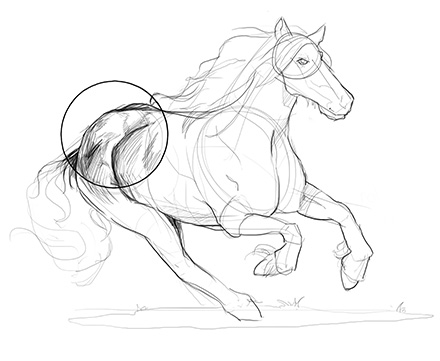 Figure 3.5 Detail
Looking at my reference closely, I saw that the horse's coat has a fairly simple, smooth sheen to it. Tight hatching seemed to capture that best.
